

Overview
If you want to build something completely new and outside the standard templates, the Create from Scratch option is your starting point. Through an intuitive visual editor, you design the path your customer will follow by connecting message and action blocks in a simple way.
Video tutorial
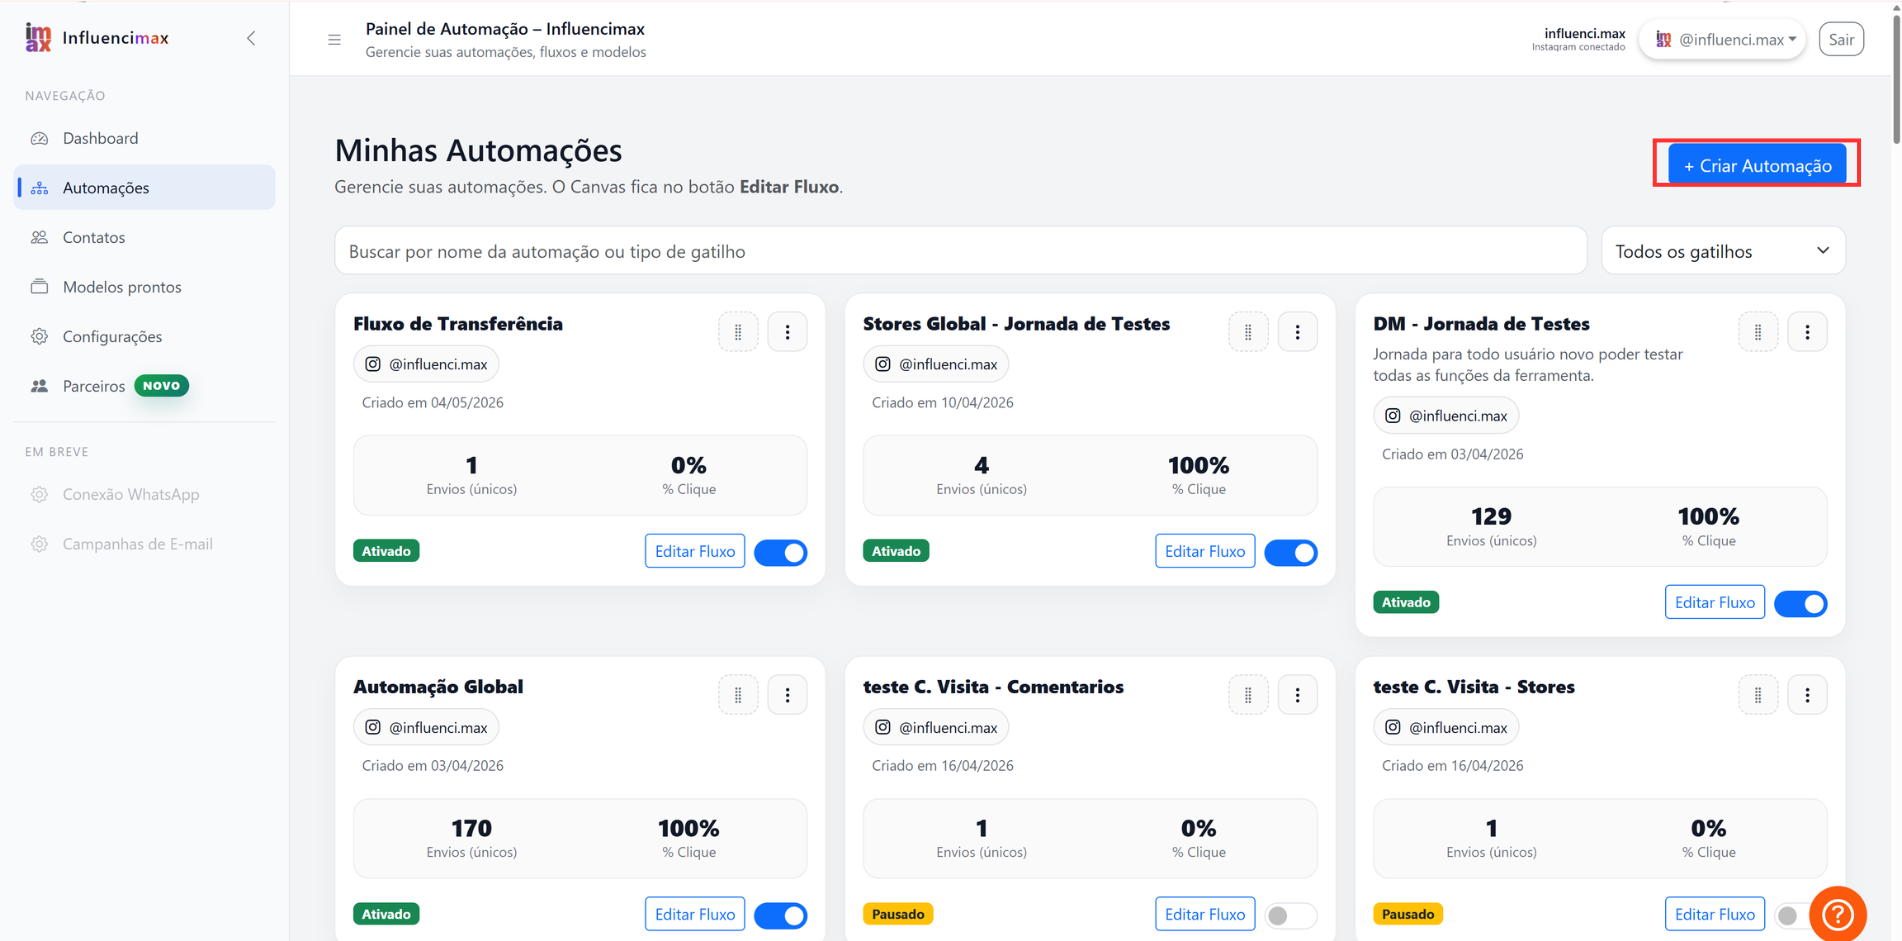
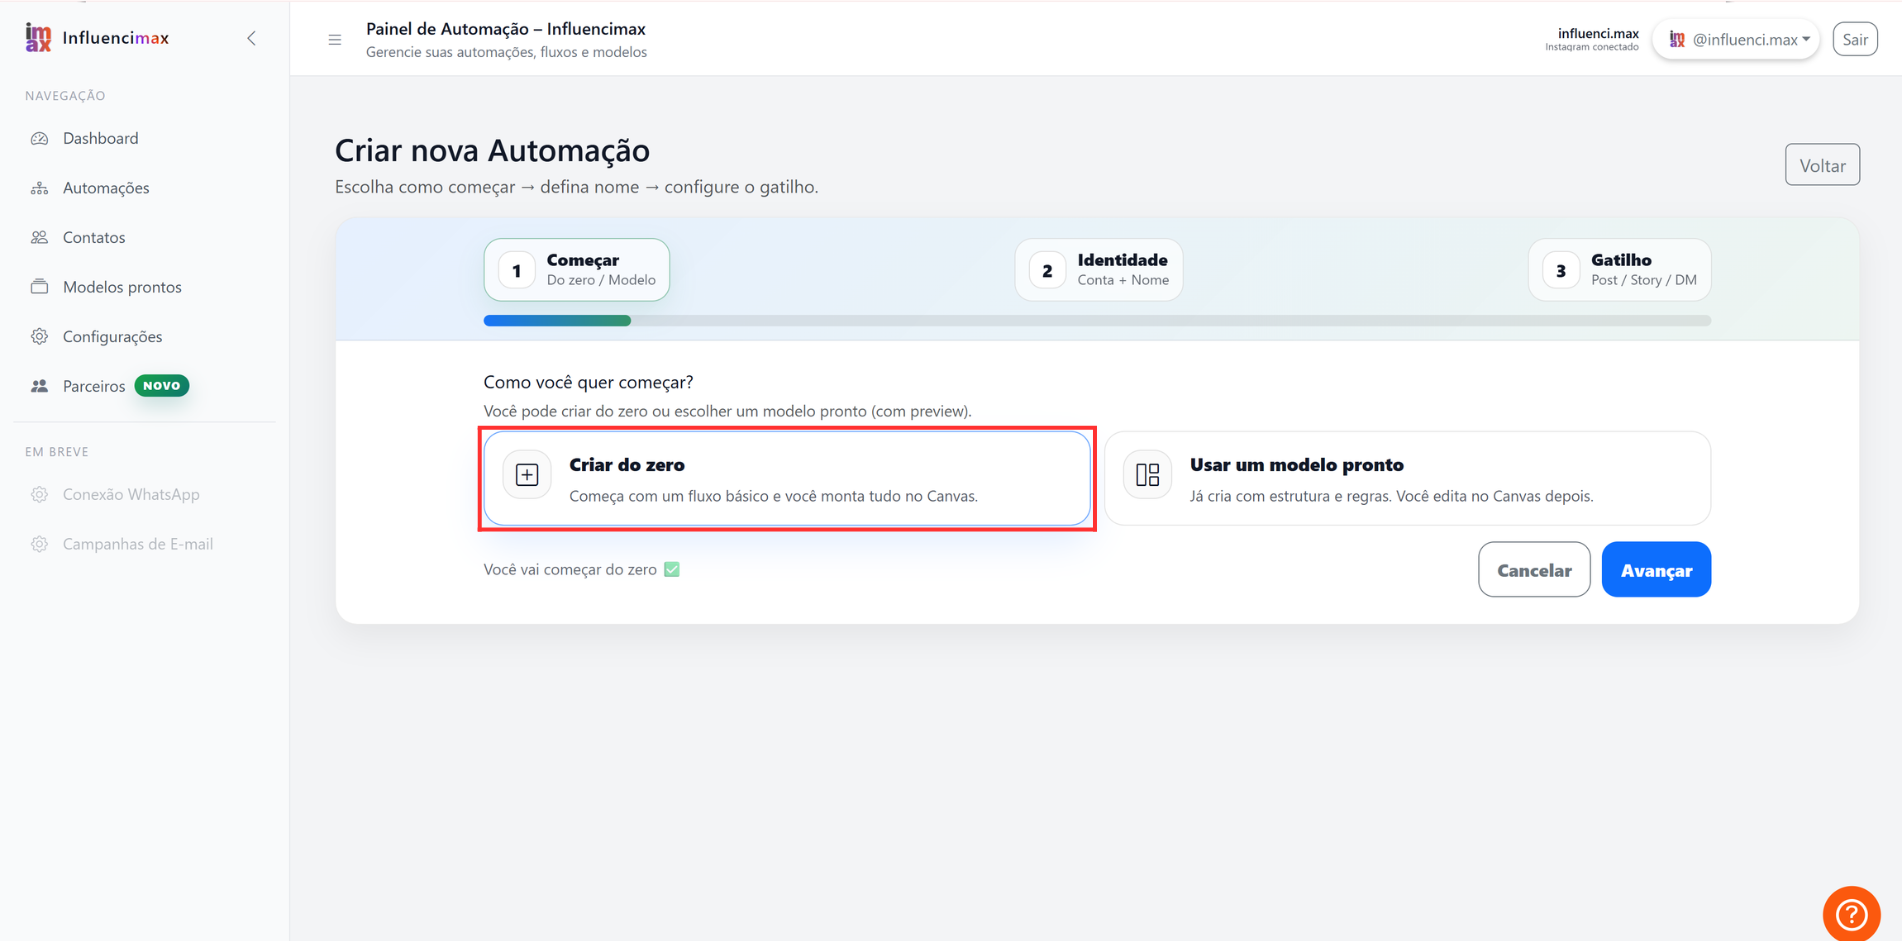
Before you start
Use this option when you want to create a custom automation without starting from the Template Gallery. The flow will be built manually in the visual editor.
Step by step
- Entering the Canvas: When you start a new automation without using templates, you enter an infinite workspace. Think of it as a whiteboard where you will design your strategy.
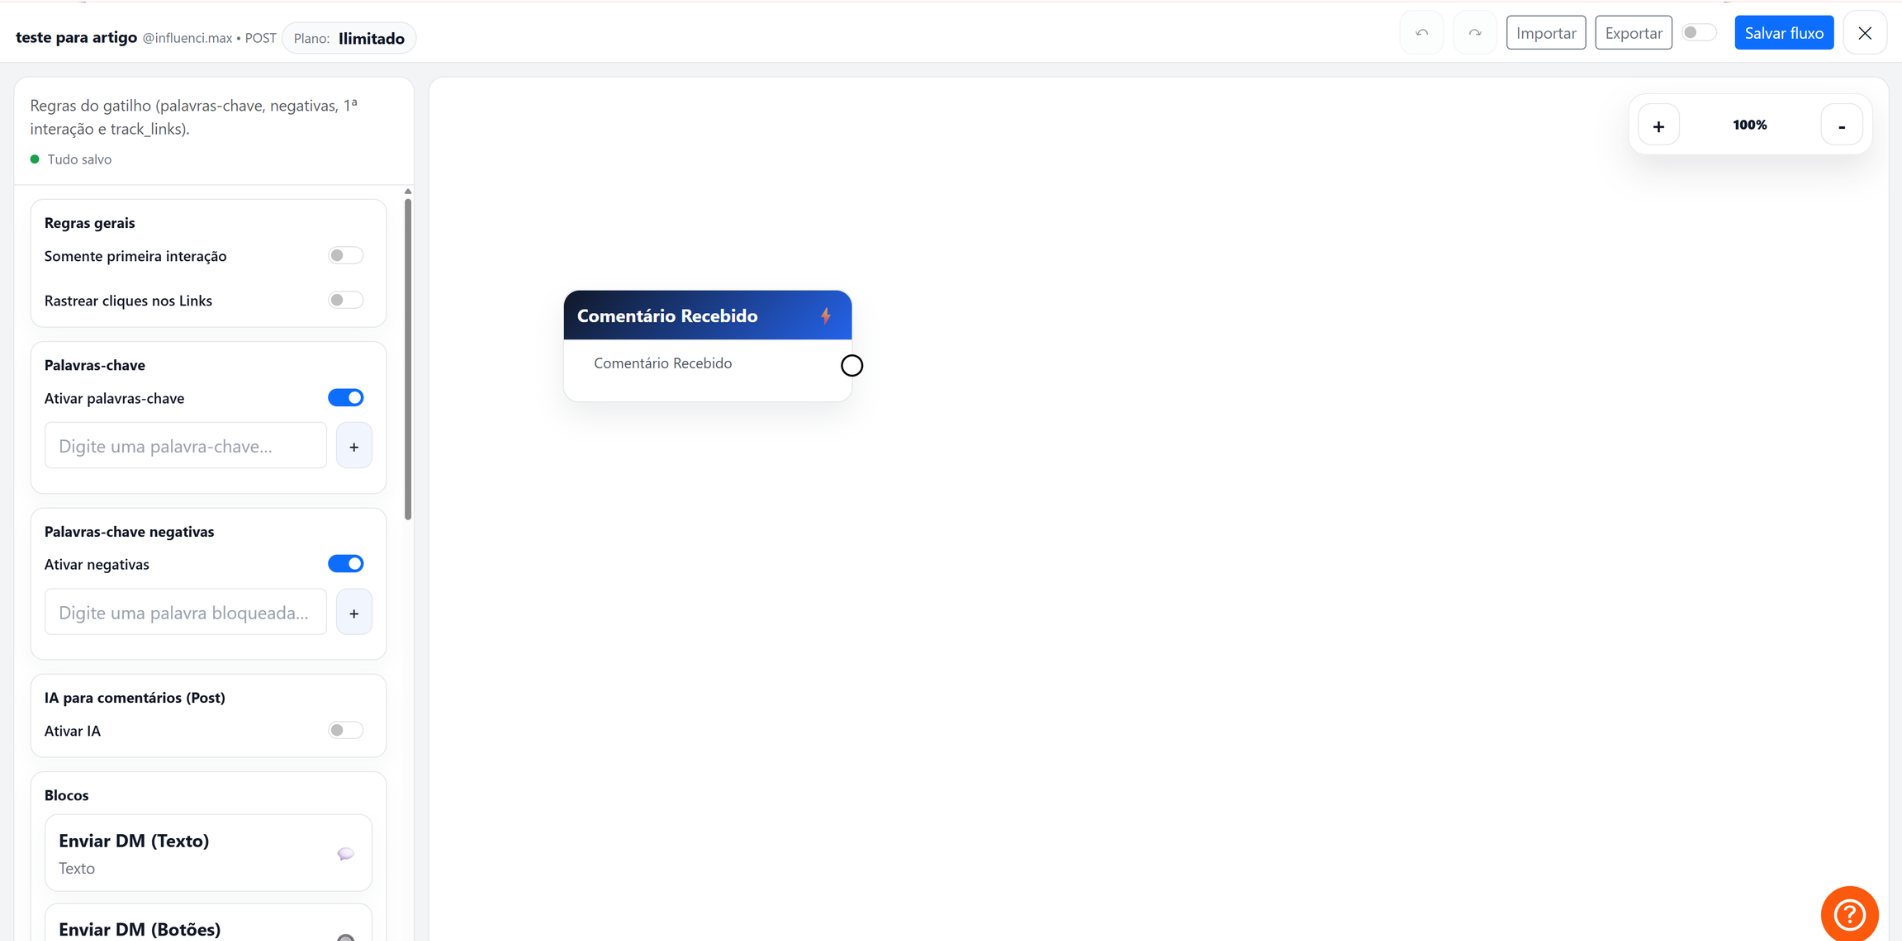
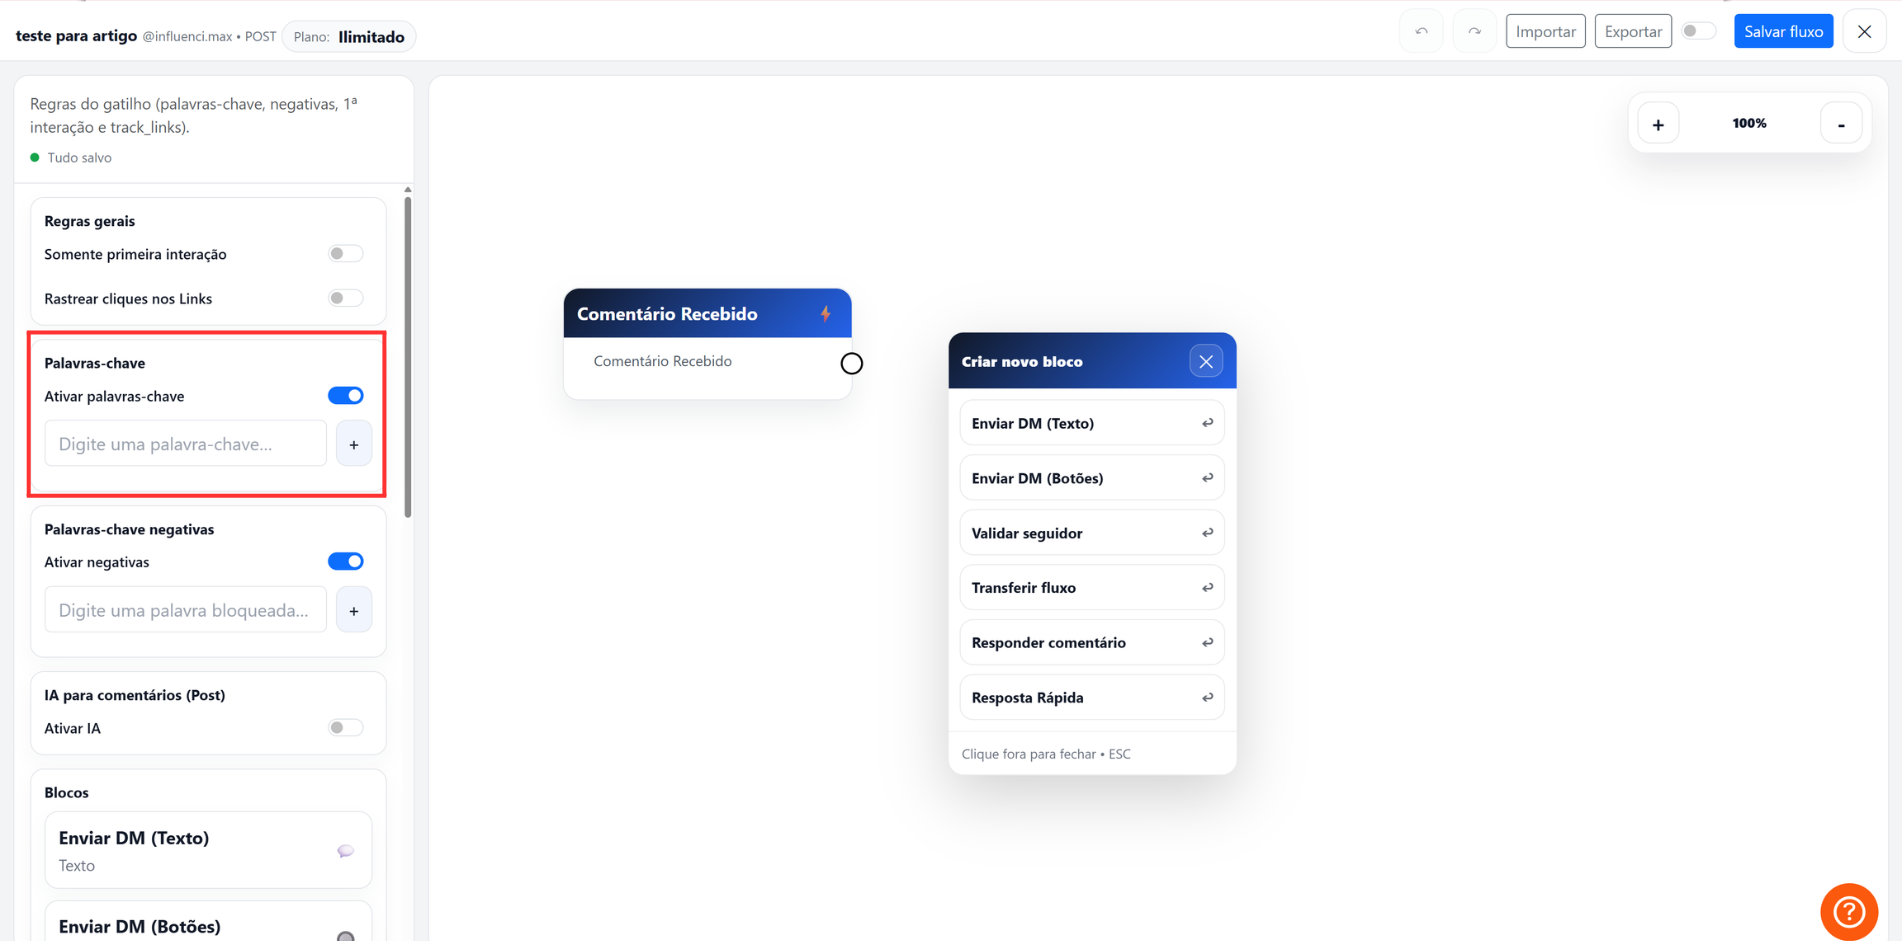
- Drag and Drop: The logic is visual. You choose a trigger, which starts the conversation, and draw lines to connect it to the responses the tool should send.
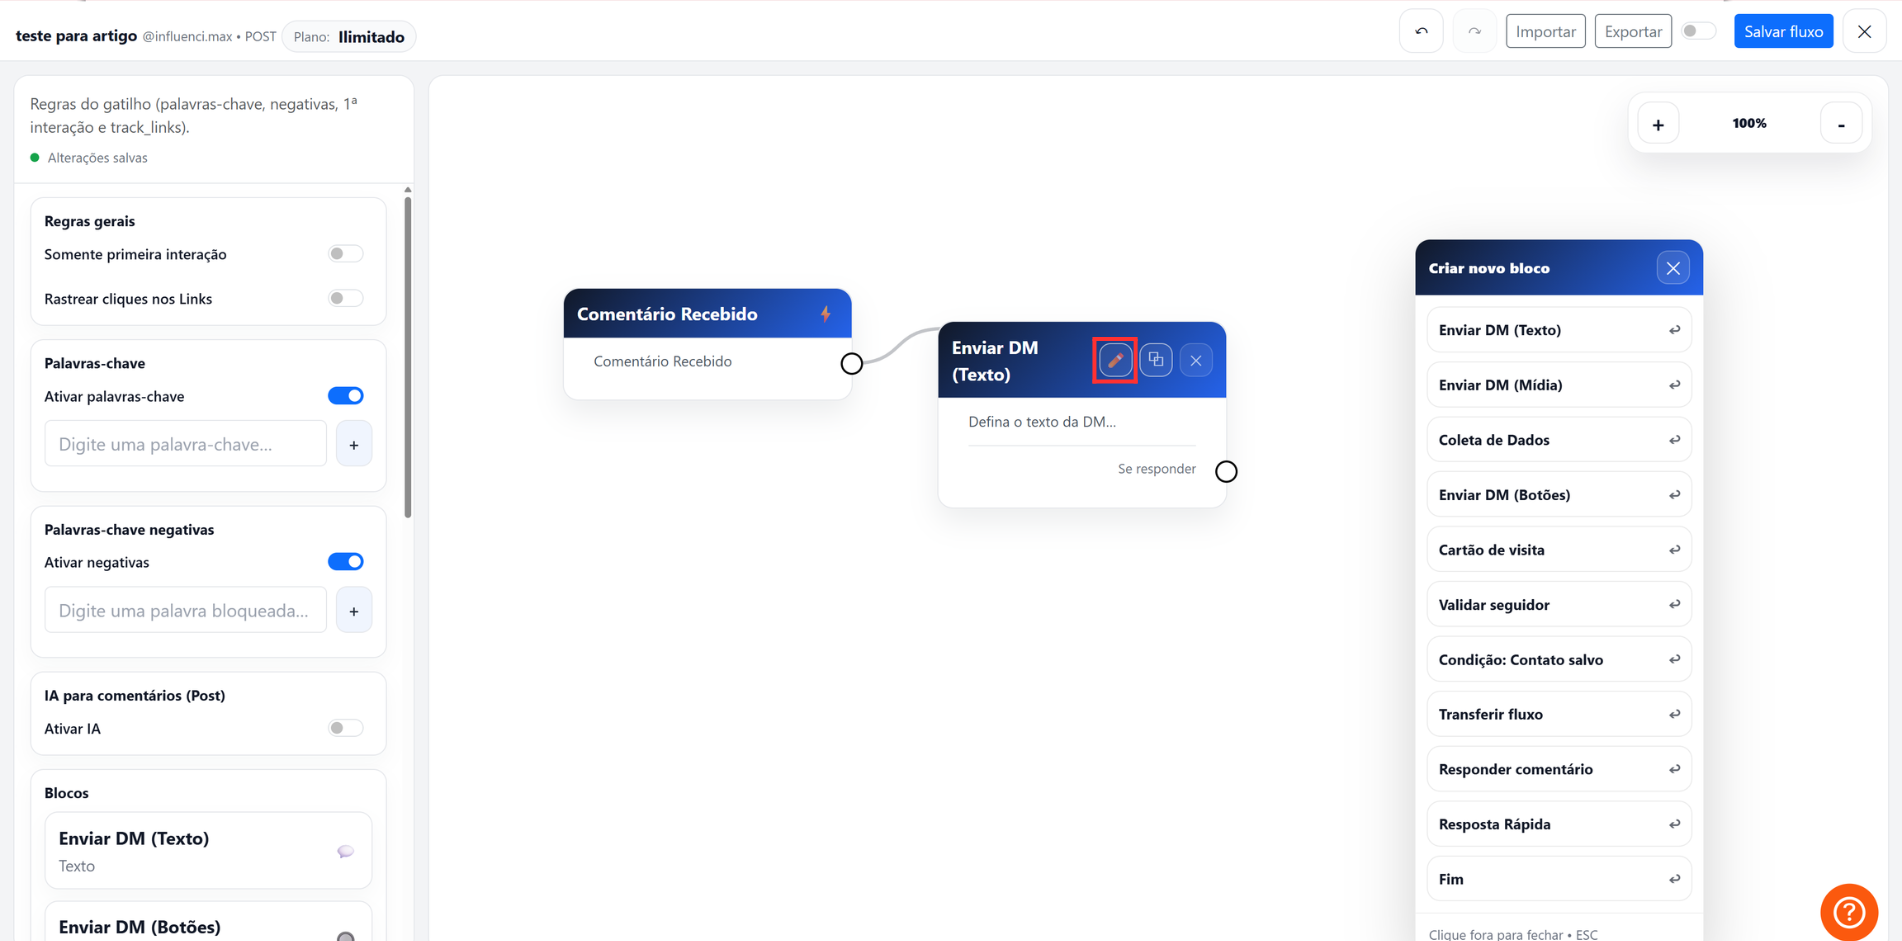
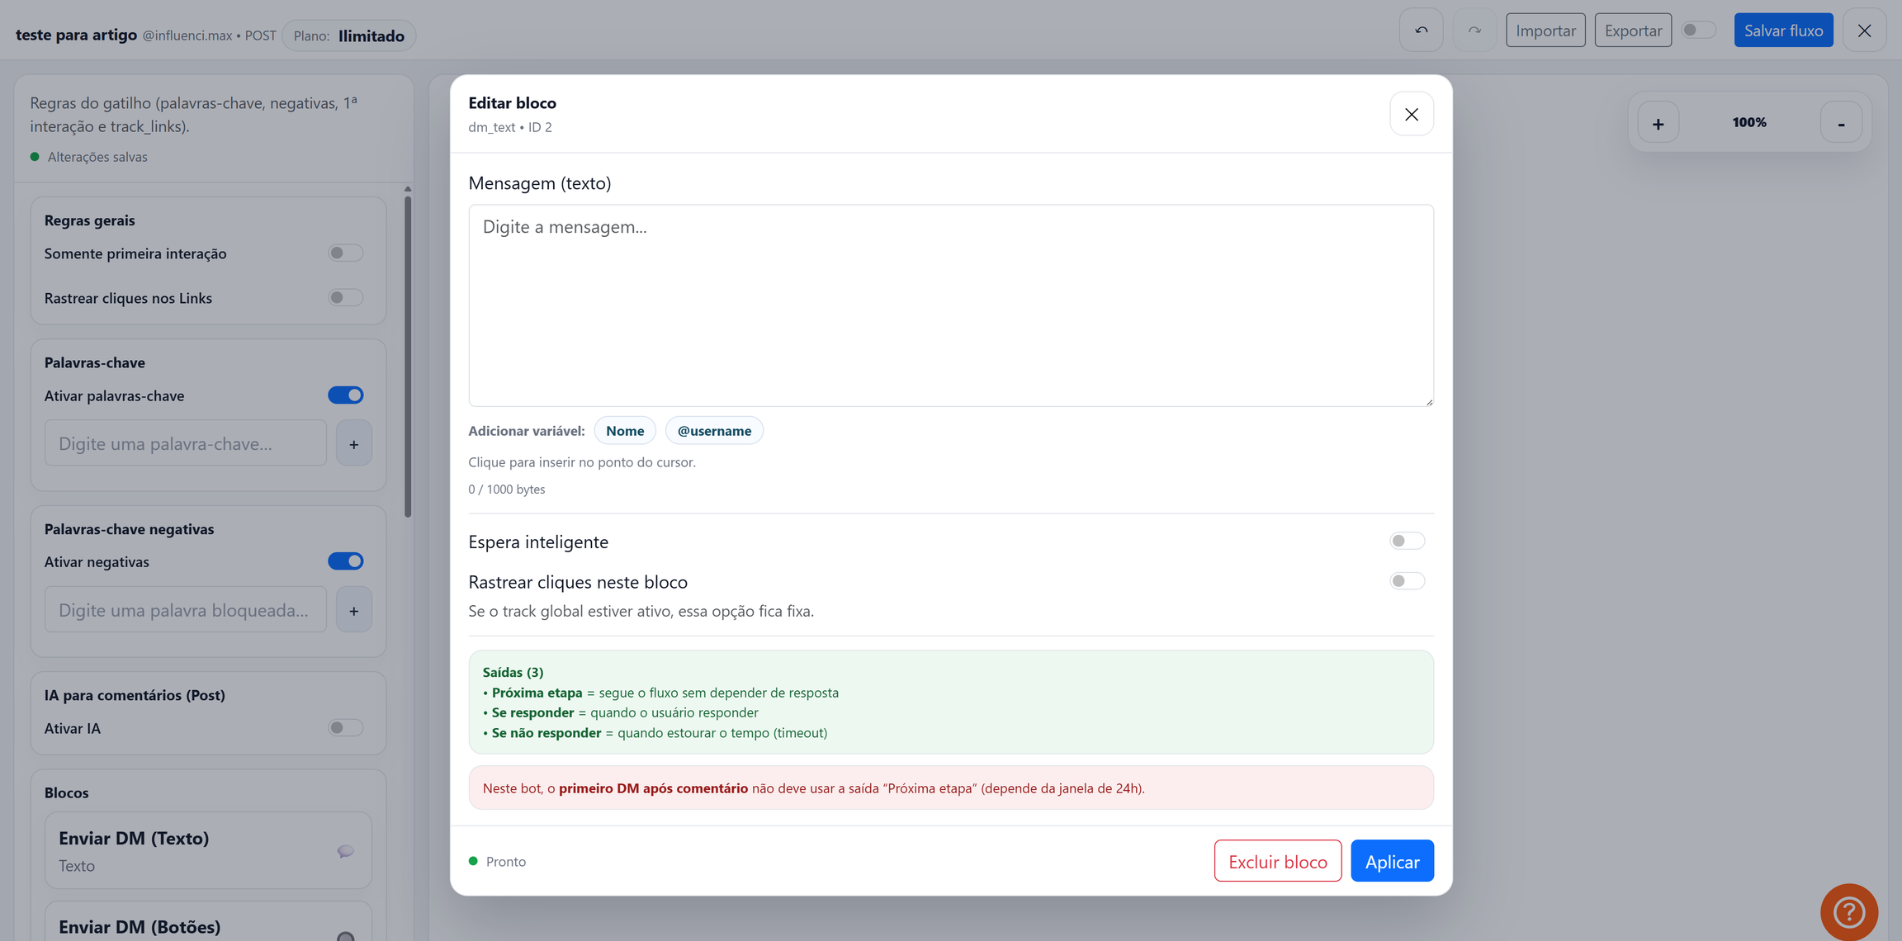
- Side Customization: Whenever you click an element on the map, its settings appear on the side. This is where you write what Max will say to your follower.
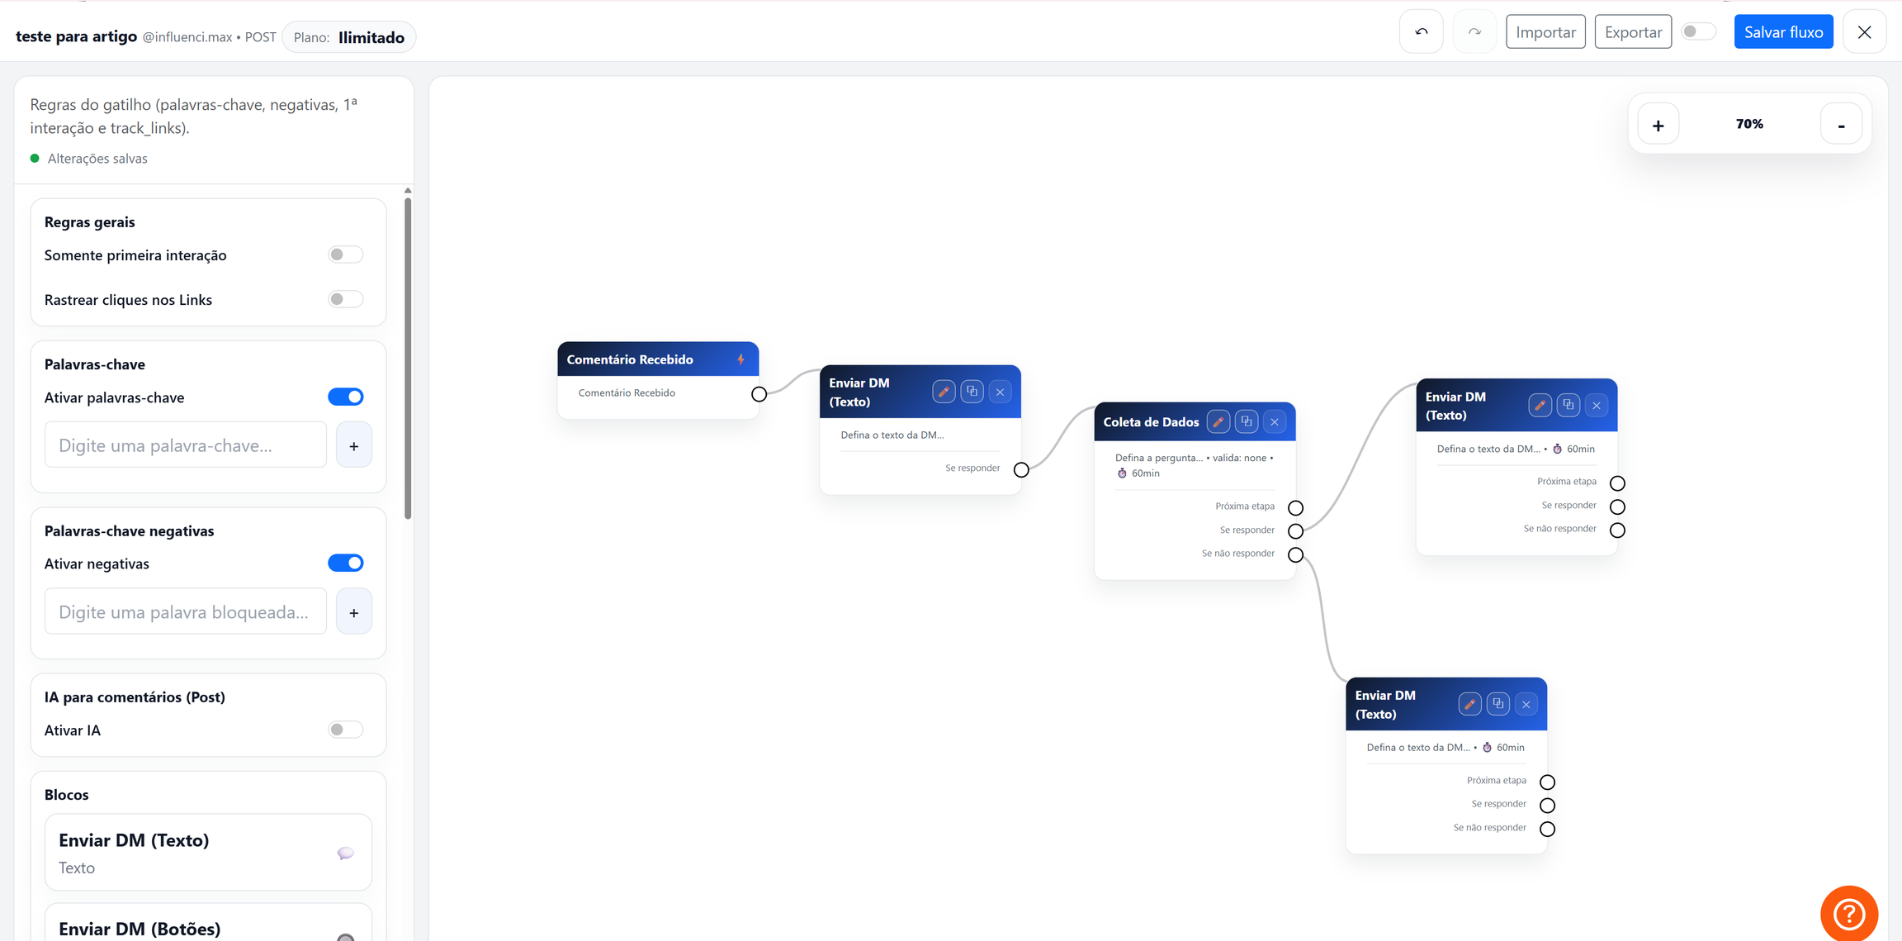
- Total Flexibility: You can create short flows with a single response or complex funnels with several questions and different paths depending on the user’s answer.
- Visual Review: The main advantage of this model is that you can see the funnel. If the line is connected, the flow will continue.
If something does not work
- Dead-End Paths: Make sure each question in your flow has a connection to a next step.
- Support Tutorials: As shown in the videos, if you have difficulty with a specific block, check the quick tutorials available inside the platform to understand what each component does.
Expected result
When finished, you will be free to create custom sales, support, or engagement funnels, with the confidence of seeing exactly how the process works before activating it.